sandustry · sandustry guide
Sandustry Guide: Beginner Factory Roadmap
Last verified: 2026-08-15
Sandustry progress is one loop repeated at growing scale: dig Sand, soak it with Water into Wet Sand, shake out Gold, and spend that gold on research that automates the digging. This Sandustry guide is the roadmap: nine steps in the order most runs need them, each with a clear "move on when" signal and a "stop and fix" warning. Mechanic details stay short — every step links to the focused page that owns it. As of August 15, 2026 this Sandustry guide reflects the Early Access build of August 13, 2026; the free demo teaches identical fundamentals, so everything here applies to both.
How to use this Sandustry guide
Read the nine steps in order the first time through; mid-save, jump to the step whose stop-and-fix line matches your symptom. Every focused Sandustry guide linked from these steps owns one machine in depth and slots back into this roadmap, so you never get two conflicting answers here.
The two currencies
- Gold pays for every research unlock: belts, launchers, filters, guns, tools, drones. Gold only counts toward your balance while it sits inside collector blocks — loose piles on the ground are decoration until boxed.
- Fluxite is the pink-purple crystal found underground (and later grown at home). It pays for personal upgrades; the standard first buys in any Sandustry guide are the material scanner (hover any pixel to see its combinations), then grabber capacity and digging speed, then hover or jetpack speed once travel slows you down. See purple? Mine it on sight.
The core loop at a glance
- Dig sand out of the terrain with the shovel.
- Drop sand into water so it becomes wet sand.
- Feed wet sand onto diagonal shakers — gold falls through, slag slides off.
- Burn the slag with a flamethrower or lava into Burnt Slag.
- Drop burnt slag onto a Kinetic Slag Press for a second gold payout plus spores.
- Spend gold on research; repeat bigger.
Community measurements cited across fan wikis put shaker yield at roughly a fifth to a quarter of the wet sand you feed in, so most of your input mass leaves as slag. Every Sandustry guide repeats the same warning here: plan for slag from minute one, not as an afterthought.
Controls that pay for themselves
A few inputs pay for themselves before your first factory, and this Sandustry guide assumes them from step 2 on. X deletes buildings — hold and drag to clear an area. Shift reverses build direction while dragging, so a misplaced belt flips instead of being demolished, and Shift plus drag marquee-selects whole facilities for copying or moving. R toggles linear and rectangular build modes — straight belt runs versus filled platforms — and S descends, which matters early: the layers worth mining sit below the starting view.
Step 1 — Earn your first gold by hand
Dig sand, pile it next to a water pool, toss it in, and drop the wet sand onto a shaker with a collector box underneath. Every Sandustry guide starts here because the game hands you nothing else: shovel, shaker, collector, block.
- Move on when: the gold counter climbs steadily while you feed the shaker.
- Stop and fix when: the counter stalls. Check that gold lands inside collector blocks, that the sand actually touched water (dry sand shakes into nothing useful), and that the shaker sits diagonally — flat shakers are the classic first mistake.
Step 2 — Unlock Logistics 1
Conveyor belts and launchers end hand-carrying. Recorded Early Access runs treat it as the first research purchase — one daily-run series rushes it with the first 80 gold, paired with the hover upgrade so building stops meaning climbing. Refining 1, which unlocks the shakers themselves, comes even earlier if you skipped it.
- Move on when: sand and wet sand move without you carrying them.
- Stop and fix when: launchers stall because nothing sits at their base, or material overshoots into water — wall off landing zones before scaling up.
Step 3 — Automate the wet-sand line
Build a washing station: launchers lift dry sand and drop it through a water column or pool, and the wet sand continues to a diagonal shaker row. One recorded beginner build this Sandustry guide follows frames it as a "sand washer" feeding a "sand shaker" tower, roughly 40 tiles tall — yours can be far smaller.
- Move on when: the line runs for minutes without your input and gold accumulates.
- Stop and fix when: slag piles bury the shaker grates (gold output silently drops), or the water pool visibly shrinks — wetting consumes water, and the map's supply is finite.
Step 4 — Store slag, then burn it
Every shaker pass produces mostly Slag. Give it a big containment box with a conveyor belt along the floor — retrofitting belts under a full box is miserable. Once Tools 1 unlocks the flamethrower, ignite slag piles to produce burnt slag, the press feedstock. Later, a cinder-and-lava bed burns it hands-free.
- Move on when: slag stops accumulating where it can contaminate wet-sand lanes.
- Stop and fix when: unburnt slag reaches the press area — lengthen the burn lane before touching the press. Full burn setups: Slag Burner guide.
Step 5 — Unlock the press (Refining 2)
The press converts falling burnt slag into gold and spores — but only one piece at a time, and it jams in a very specific way. This Sandustry guide only flags the failure; the full anti-jam layout lives on the dedicated page.
- Move on when: pieces fall singly through the press and spores drain away from underneath it.
- Stop and fix when: a pile forms on the press face. Do not feed it faster — meter the input with a filter. Fix list: Kinetic Press guide.
Step 6 — Put filters on everything mixed
Filters pass or block one chosen pixel type and otherwise behave like slow conveyor belts — the cheapest fix for contaminated streams, and the flow regulators this Sandustry guide leans on before every delicate machine.
- Move on when: each storage box holds exactly one material.
- Stop and fix when: wrong material slips through — the filter only inspects the single tile directly above it, so thick piles defeat it. Narrow the stream first. Geometry details: Filter guide.
Step 7 — Secure your water supply
Map water is finite, but the phase loop is your friend: water boils to steam, steam rises and condenses, rain falls back down. A covered reservoir placed near the condensation height recycles what you boil; one beginner write-up this Sandustry guide cites even documents a steam-duplication quirk that slowly multiplies water — an acknowledged unintended bug, so expect it to vanish in a patch.
- Move on when: wetting and spore-washing never wait for water.
- Stop and fix when: rain floods factory floors (roof the steam channels) or snow drifts into reservoirs and freezes them.
Step 8 — Grow the botanical chain to fluxite
Spores from the press become wet spores, wet spores in planter boxes grow flowers, and destroyed flowers drop gold and Amethelis petals. Petals mixed with heavy red sand create VoidBloom, and VoidBloom fed to the one-per-world Flux Emanator grows harvestable Fluxite. Box the flower farm in solid blocks, belts, or launchers — escaped flowers spread across the map, and veteran players describe the cleanup as a run-defining regret.
- Move on when: petals and red sand both reach the mixing bin.
- Stop and fix when: wet spores hang mid-water in the wash tank — spores that touch water take on its density, so they neither sink nor float out on their own. Layout help: Flux Emanator guide.
Step 9 — Push deeper: guns, crackstone, artifacts, drones
The Guns branch replaces your shovel for mining and ends at the rocket launcher — the only practical answer to crackstone barriers, and the key to artifact chambers. Below that sit lava lakes, the cryoblaster's cinder trick, and eventually digger and hauler drones: the widest territory this Sandustry guide covers.
- Move on when: each new tool opens terrain the previous tier could not touch.
- Stop and fix when: you meet a wall that no tool scratches — that is crackstone, and it waits for explosives. Detours worth taking: Artifact guide, Haulers guide.
Mistakes worth skipping
The short list this Sandustry guide would hand every new player:
- Shakers built flat instead of diagonal.
- Deleting slag piles instead of budgeting a burn lane.
- Researching drones before belts reliably feed the shakers.
- Piping water into a washing station with no overflow or vent plan.
- Descending without lights or a grapple plan.
- Building storage with no belt-and-filter floor.
- Letting flowers escape containment.
- Sizing the gold box for the gold you have, not the gold you will have.
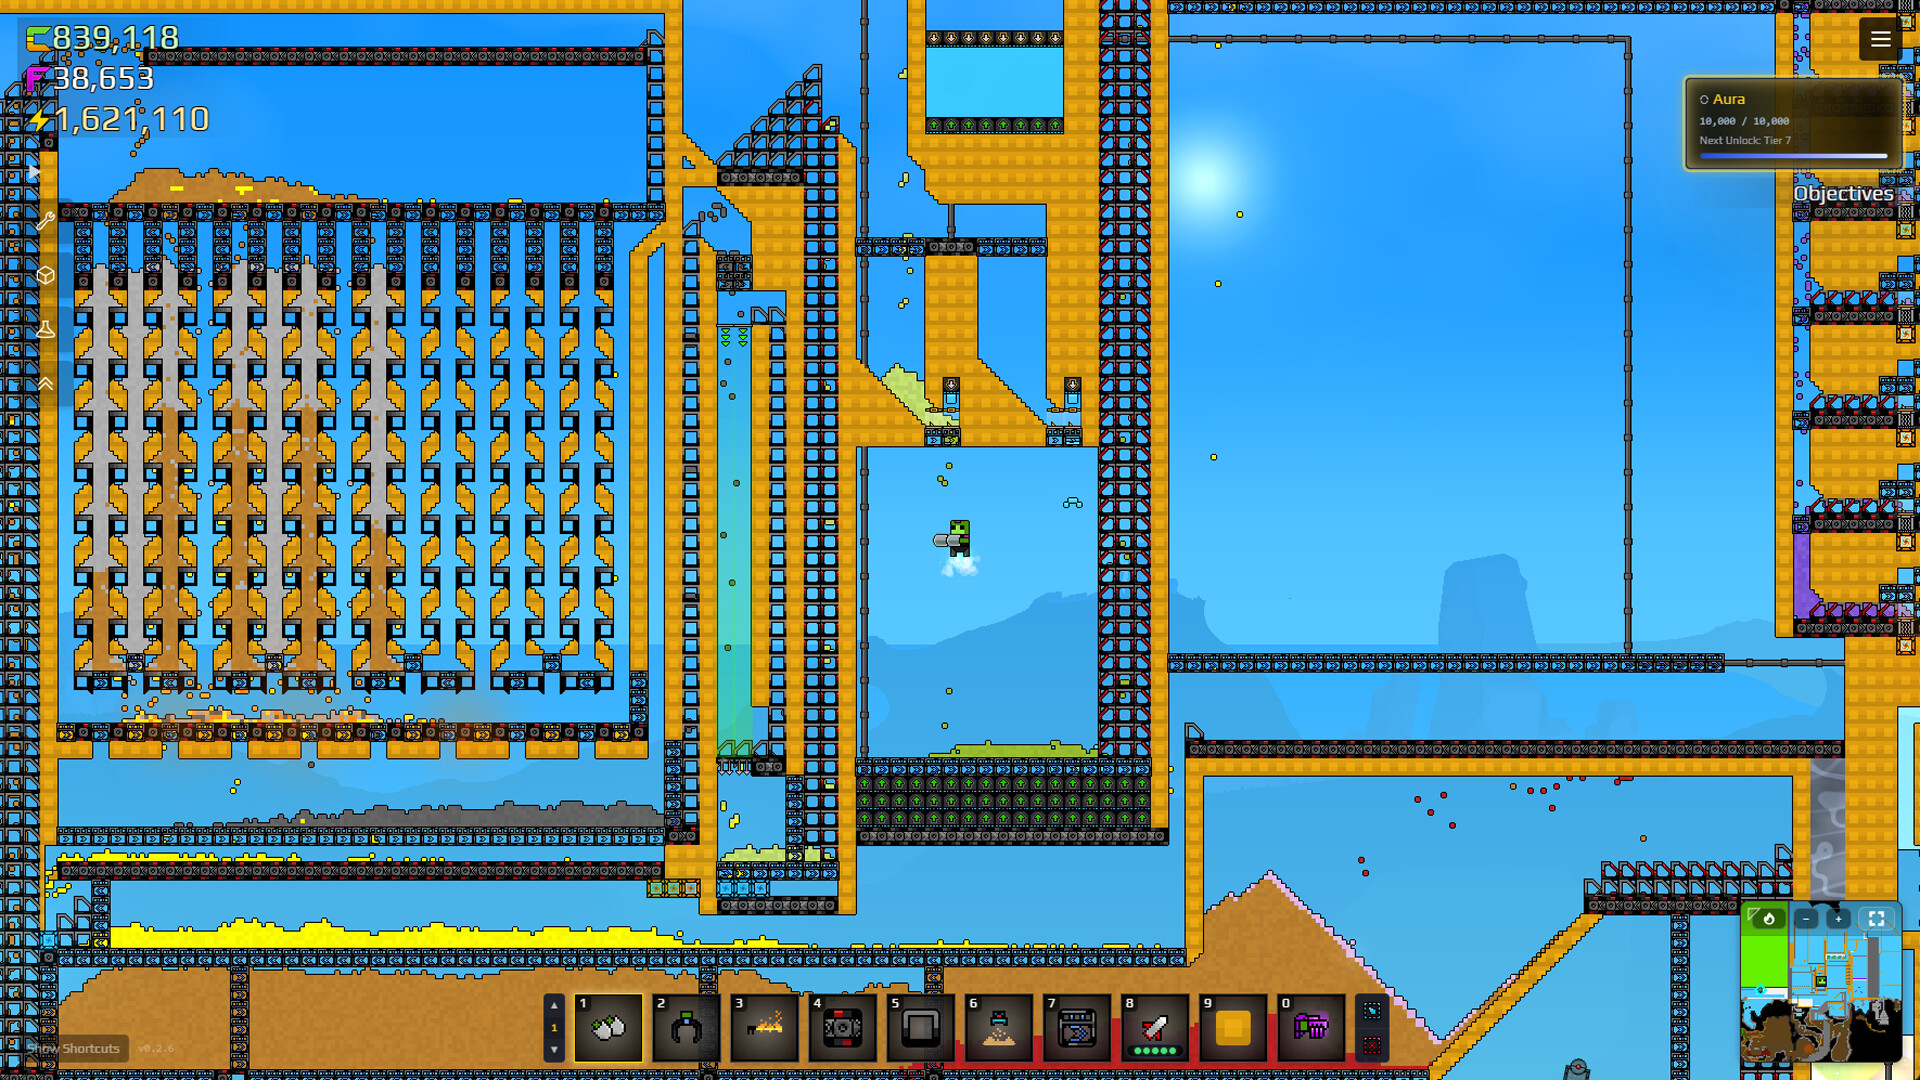
One last habit from every long-form run this Sandustry guide drew on: keep walking your own factory. Idly watching machines hides slow failures — a piling press, a shrinking pool, a stalled launcher — that a two-minute patrol catches before they cost an hour.
Watch it in action
FAQ
What am I actually trying to build in Sandustry?
Turn sand and water into gold with shakers, then recover a second gold stream by burning slag and pressing it. Gold funds the research tree, while fluxite — the pink-purple material — pays for permanent upgrades.
What should I research first?
Recorded Early Access runs prioritize Logistics 1 (conveyor belts and launchers) once hand-carrying slows you down, then Filters, Tools 1 for the flamethrower, and Refining 2 for the Kinetic Slag Press. The Guns branch follows when you want the rocket launcher for digging and crackstone.
Why is my gold counter not going up?
Gold only registers while it sits inside collector blocks. Loose gold on the ground or on a belt is invisible to your balance until you box it in.
Can I learn the game in the free demo?
Yes. The demo teaches the identical dig-wet-shake loop, and everything on this page applies to both versions. Early Access, released August 13, 2026, adds a larger map, more research, and deeper biomes.
Is Sandustry multiplayer?
No. It is single-player only, with mod support through Steam Workshop and the Fluxloader toolchain.
Which upgrades should my first fluxite buy?
Recorded runs this Sandustry guide draws on start with the material scanner, expanded grabber capacity, and digging speed, then hover or jetpack speed once travel becomes the slowest part of your loop.
How do I use this Sandustry guide mid-save?
Jump straight to the step whose stop-and-fix line matches your symptom. Each step links to the focused page that owns that machine, and every answer routes back into this same roadmap.
Sources
- Sandustry Guide fan hubhttps://www.sandustryguide.online/
- Into Indie Games: early-game tipshttps://intoindiegames.com/walkthroughs/tips-tricks/sandustry-best-early-game-tips-and-tricks/
- note.com introductory guide (Japanese, machine-translated)https://note.com/tasty_gnu818/n/nfd0c7990cd7b?hl=en
- TrimBarktree beginner guide (captions)https://www.youtube.com/watch?v=Nrto76bFpuo
- Early Access daily-run beginner tips (captions)https://www.youtube.com/watch?v=xllk2jL9d3s
- PicaPinguin best beginner build (captions)https://www.youtube.com/watch?v=ZUGJhU3dHt4
- sandustry.wiki: How to Playhttps://sandustry.wiki/guides/how-to-play/
- sandustrywiki.wiki beginner guidehttps://www.sandustrywiki.wiki/en/guides/beginner-guide/
- Official Sandustry sitehttps://sandustry.com/
- Sandustry on Steam (app 2764460)https://store.steampowered.com/app/2764460/Sandustry/
- Official launch trailerhttps://www.youtube.com/watch?v=-m7xp1q24Qw